Are you planning to ride your first Elementary test? Whether you’re working towards getting out and competing once live competitions restart, or have entered one of Equestrian Life’s virtual competitions, these tips are for you!

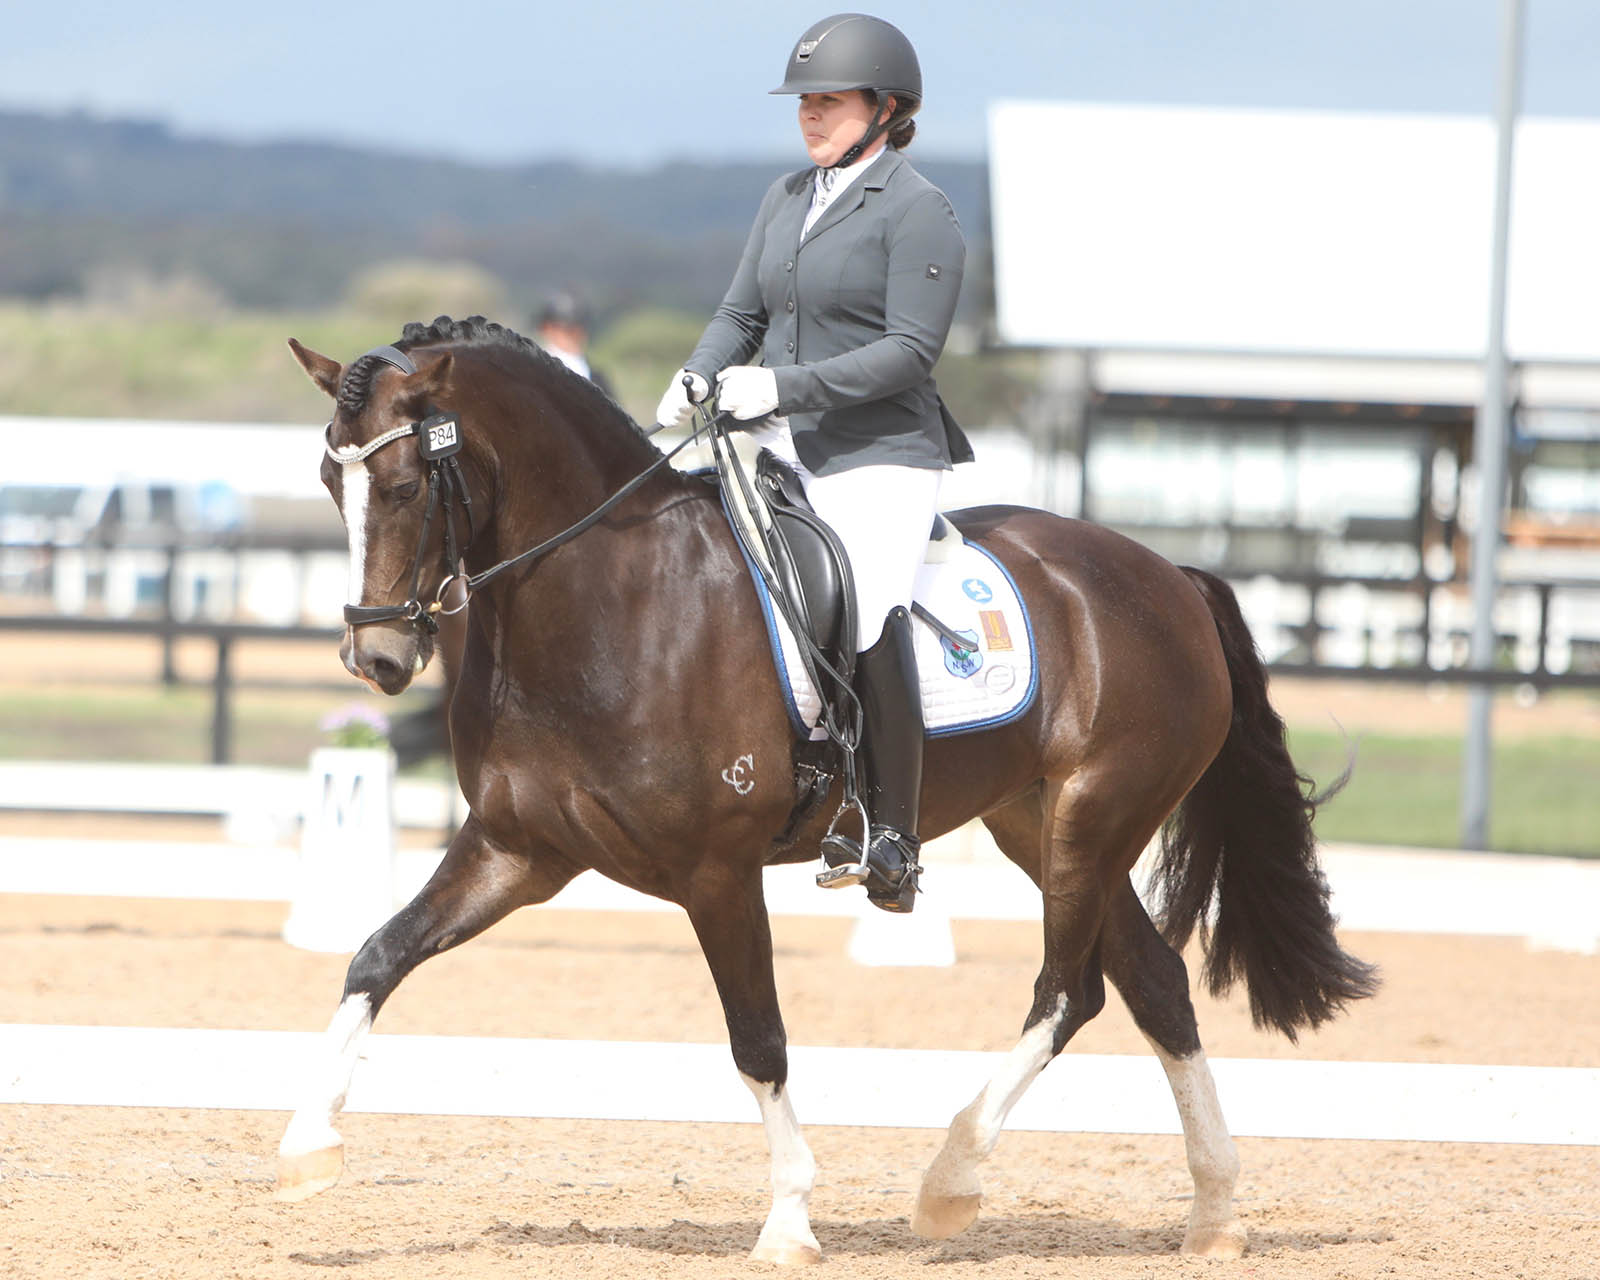
A combination showing collected trot in Pony Elementary class. © Roger Fitzhardinge
“The horse should move
with an uphill tendency.”
There are three Equestrian Australia (EA) Elementary level tests — Elementary 3A, 3B and 3C. The purpose of this level is to confirm that the horse demonstrates correct basics, and having achieved the thrust required in Novice, now accepts more weight on the hindquarters (collection).
In addition, the horse should move with an uphill tendency, especially in the medium paces, as well as be reliably on the bit. The tests also explain that a greater degree of straightness, bending, suppleness, throughness, balance and self-carriage is required compared to the Novice Level.
We catch up with our resident FEI rider and virtual competition judge, Roger Fizhardinge, to see what other tips he has for riding a great Elementary level test…
1. Show clear transitions within the paces
The Elementary test includes a number of transitions within the paces, for example collected trot, medium trot, collected trot. As Roger explains, there are marks allocated specifically for these transitions so it’s therefore important to make them clear.
“Make clear transitions in and out. The most important thing to see in the trot transitions is a downward transition at the end of the medium, even if it’s modest, so the judge sees the transition — as that’s when they put the mark down, at the end of the movement,” says Roger.
Roger also notes that it is important not to push too hard in that medium trot: “Make certain that you don’t override in the medium trot, because there is still extended trot to show (in future levels)!”
2. Go rising trot for the medium work
The Elementary tests are the first where much of the trot work needs to be ridden sitting — the exception is the medium trot, which can be ridden rising if preferred.
Although it does come down to the individual horse and rider, Roger believes that it often pays off to go rising trot for this movement: “I usually prefer to see medium trot done in rising. It makes it look more balanced; you can go from sitting to rising in the transition to medium, and then back to sitting for the transition to collected. It makes a statement.”
3. Consistency is key in the shoulder-in
The shoulder-in is introduced at Elementary level, and Roger explains the consistency in the angle and rhythm is crucial.
“Make certain that the angle stays on three tracks — if anything a tiny bit more than three tracks — so the judge can see the angle. Make certain that the angle doesn’t vary, and don’t show any change in pace from the beginning of the shoulder-in to the end of the shoulder-in; keep the same rhythm. If it’s a little behind the leg, don’t show this to the judge by chasing it forward halfway through, it must stay consistent.”
Another small detail that Roger points out is how to ride the shoulder-in when it’s followed by half-circle or full circle as per the B and C tests: “At the end of the shoulder-in, if there’s a circle you don’t need to straighten before you go on to the circle.”

An elementary horse showing a confident and balanced shoulder in. © Roger Fitzhardinge
4. Make sure the travers is on four tracks
Travers is the first exercise when the horse looks, bends and flexes in the direction it’s moving. “Make certain it’s on four tracks, and don’t exaggerate the flexion but make certain there is flexion to the inside. Don’t start the travers too early if it’s off a circle, but certainly don’t go straight and then into travers; it should be the last step of the circle taken down the track.
“At the end, you have to straighten a little bit to go around the corner or onto a circle, so it’s not like shoulder-in… you do need to straighten at the end.”
5. In the rein back, rounder is better than hollow
To begin with, Roger explains that it’s important to establish a steady and square halt, and this needs to be maintained for two to three seconds before starting the rein-back.
“Then make certain the rein back doesn’t come above the bit or too low. In the baby horses just beginning rein back, it’s better to have the horse a little bit deep rather than a little bit hollow; if they’re hollow, they’ll drop their back and they won’t be able to step backwards with clear steps. But if they’re a little bit rounder, they will.
“Make certain the neck doesn’t get shorter in the rein-back. Practice it a lot and make certain the steps are in diagonal pairs… otherwise you’ll get a bad mark for loss of rhythm. Remember, the three to four steps are counted with the front feet.”
6. Aim for a progressive and uphill walk to canter transition
The walk to canter transition is included in all three Elementary tests. “You should aim for an uphill feeling in the transition,” says Roger. “The horse shouldn’t bolt off straightaway into working canter; the transition is progressive, but in front of you. The outline must stay round.” Roger also notes that it’s important to make sure you ride your corner(s) following the transition.

An Elementary horse showing a good uphill canter. © Roger Fitzhardinge
“Make certain that
you don’t override in
the medium trot.”
7. Accuracy is key for the 10-metre canter circle
When it comes to the 10-metre canter circle, Roger places an emphasis on accuracy — it needs to be dead on 10 meters. “You must nail that centreline, or if it’s at A or C, make sure it’s only five meters either side of the centreline.”
Having the correct bend and flexion on the circle is also important. “Make sure there is not excessive flexion so the horse falls out; there needs to be just enough flexion for the circle. And the bend around inside leg, make certain this does not move into travers; if you use too much outside leg, the quarters will come in, so it must be straight but bending on the direction of the circle.”
8. Maintain the walk rhythm through the half-turn on the haunches
The turn on the haunches (hindquarters) is performed slightly bigger than a walk pirouette with the hind legs.
“The rhythm of the walk must be maintained. It must keep the activity of the hind legs and must be flexed and bent in the direction of the turn.”
9. Accuracy and preparation is important in the serpentine
The serpentine with simple changes through walk forms part of the B test. As Roger, explains, there is an individual score for the two simple changes, as well as the quality of the serpentine, and preparation is key.
“It must go canter, collect, collect, collect, to cantering on the spot, and then lightly down into walk as you cross the centreline, and then the walk must show three to four clean steps. This is followed by a half-halt, and a transition to canter.
“As you come back to walk, it’s a good idea to make sure you keep your outside rein and outside leg on… almost move the horse a little bit away from your outside leg, and have the horse straight and almost in position for the new direction as you take the first walk step. This means you’re not going to waste time in the walk repositioning and balancing. So it’s vitally important to do that.
“The mark for the serpentine is three half 20-metre circles, so there’s only one really straight walk step each time you cross the centreline. So if you’re going to do three steps, you do one, you land and walk the step before the centreline, you walk straight over the centreline with new flexion left, and then canter left the next step.
As Roger explains in his article 10 Tips for Riding the Preliminary Test, accuracy is also important when riding a serpentine. “The serpentine positioning should be three equal loops, and make certain the last loop does not go into the corner, and when you finish the serpentine at C or A, that you then go into the next corner so there’s a clear difference between a half 20-metre circle and the beginning and end of the serpentine with a corner.”

Accuracy and preparation is important when riding the serpentine in canter. © Roger Fitzhardinge
“The rhythm of the walk
must be maintained.”
10. Give yourself time in the simple changes on the short diagonal
The 3C test introduces a three-loop serpentine with no lead change (the centre loop is in counter canter); this is done from both reins, and each time the serpentine is followed by a change of rein across the short diagonal with a simple change.
Roger had some tips for riding the simple change on the short diagonal: “Make certain that when riding this diagonal line in the canter you head a little before the marker, not after the marker, because it doesn’t give you much time to get the angle and the straightness correct before you make the simple change. The change is exactly like we’ve done with serpentine (in the B test), except it’s on a straight line, but you still keep the flexion to the leading leg.
“As you collect the canter for the simple change, feel that your outside leg pushes the horse a little towards the wall and your outside rein gets the horse straight, and then becomes an inside rein and flexion so you’re prepared for the new canter direction… and it goes straight down the track, not on a curving line.”
If you’ve been reading Roger’s dressage test tips to date, you’ll know that the final ingredient to any good dressage test is a positive attitude… Always finish with a smile!
Equestrian Australia Elementary tests:
Riding the Preliminary or Novice tests? Roger has covered these in our previous issues:
10 Tips for Riding the Preliminary Tests
10 Tips for Riding the Novice Tests
EQ
YOU MIGHT ALSO LIKE TO READ:
From crash landing to airborne rescue (By Roger Fitzhardinge)


