Are you planning to ride your first Advanced test? Whether you’re working towards competing at a local event or have entered one of Equestrian Life’s virtual competitions, Roger’s tips are for you!

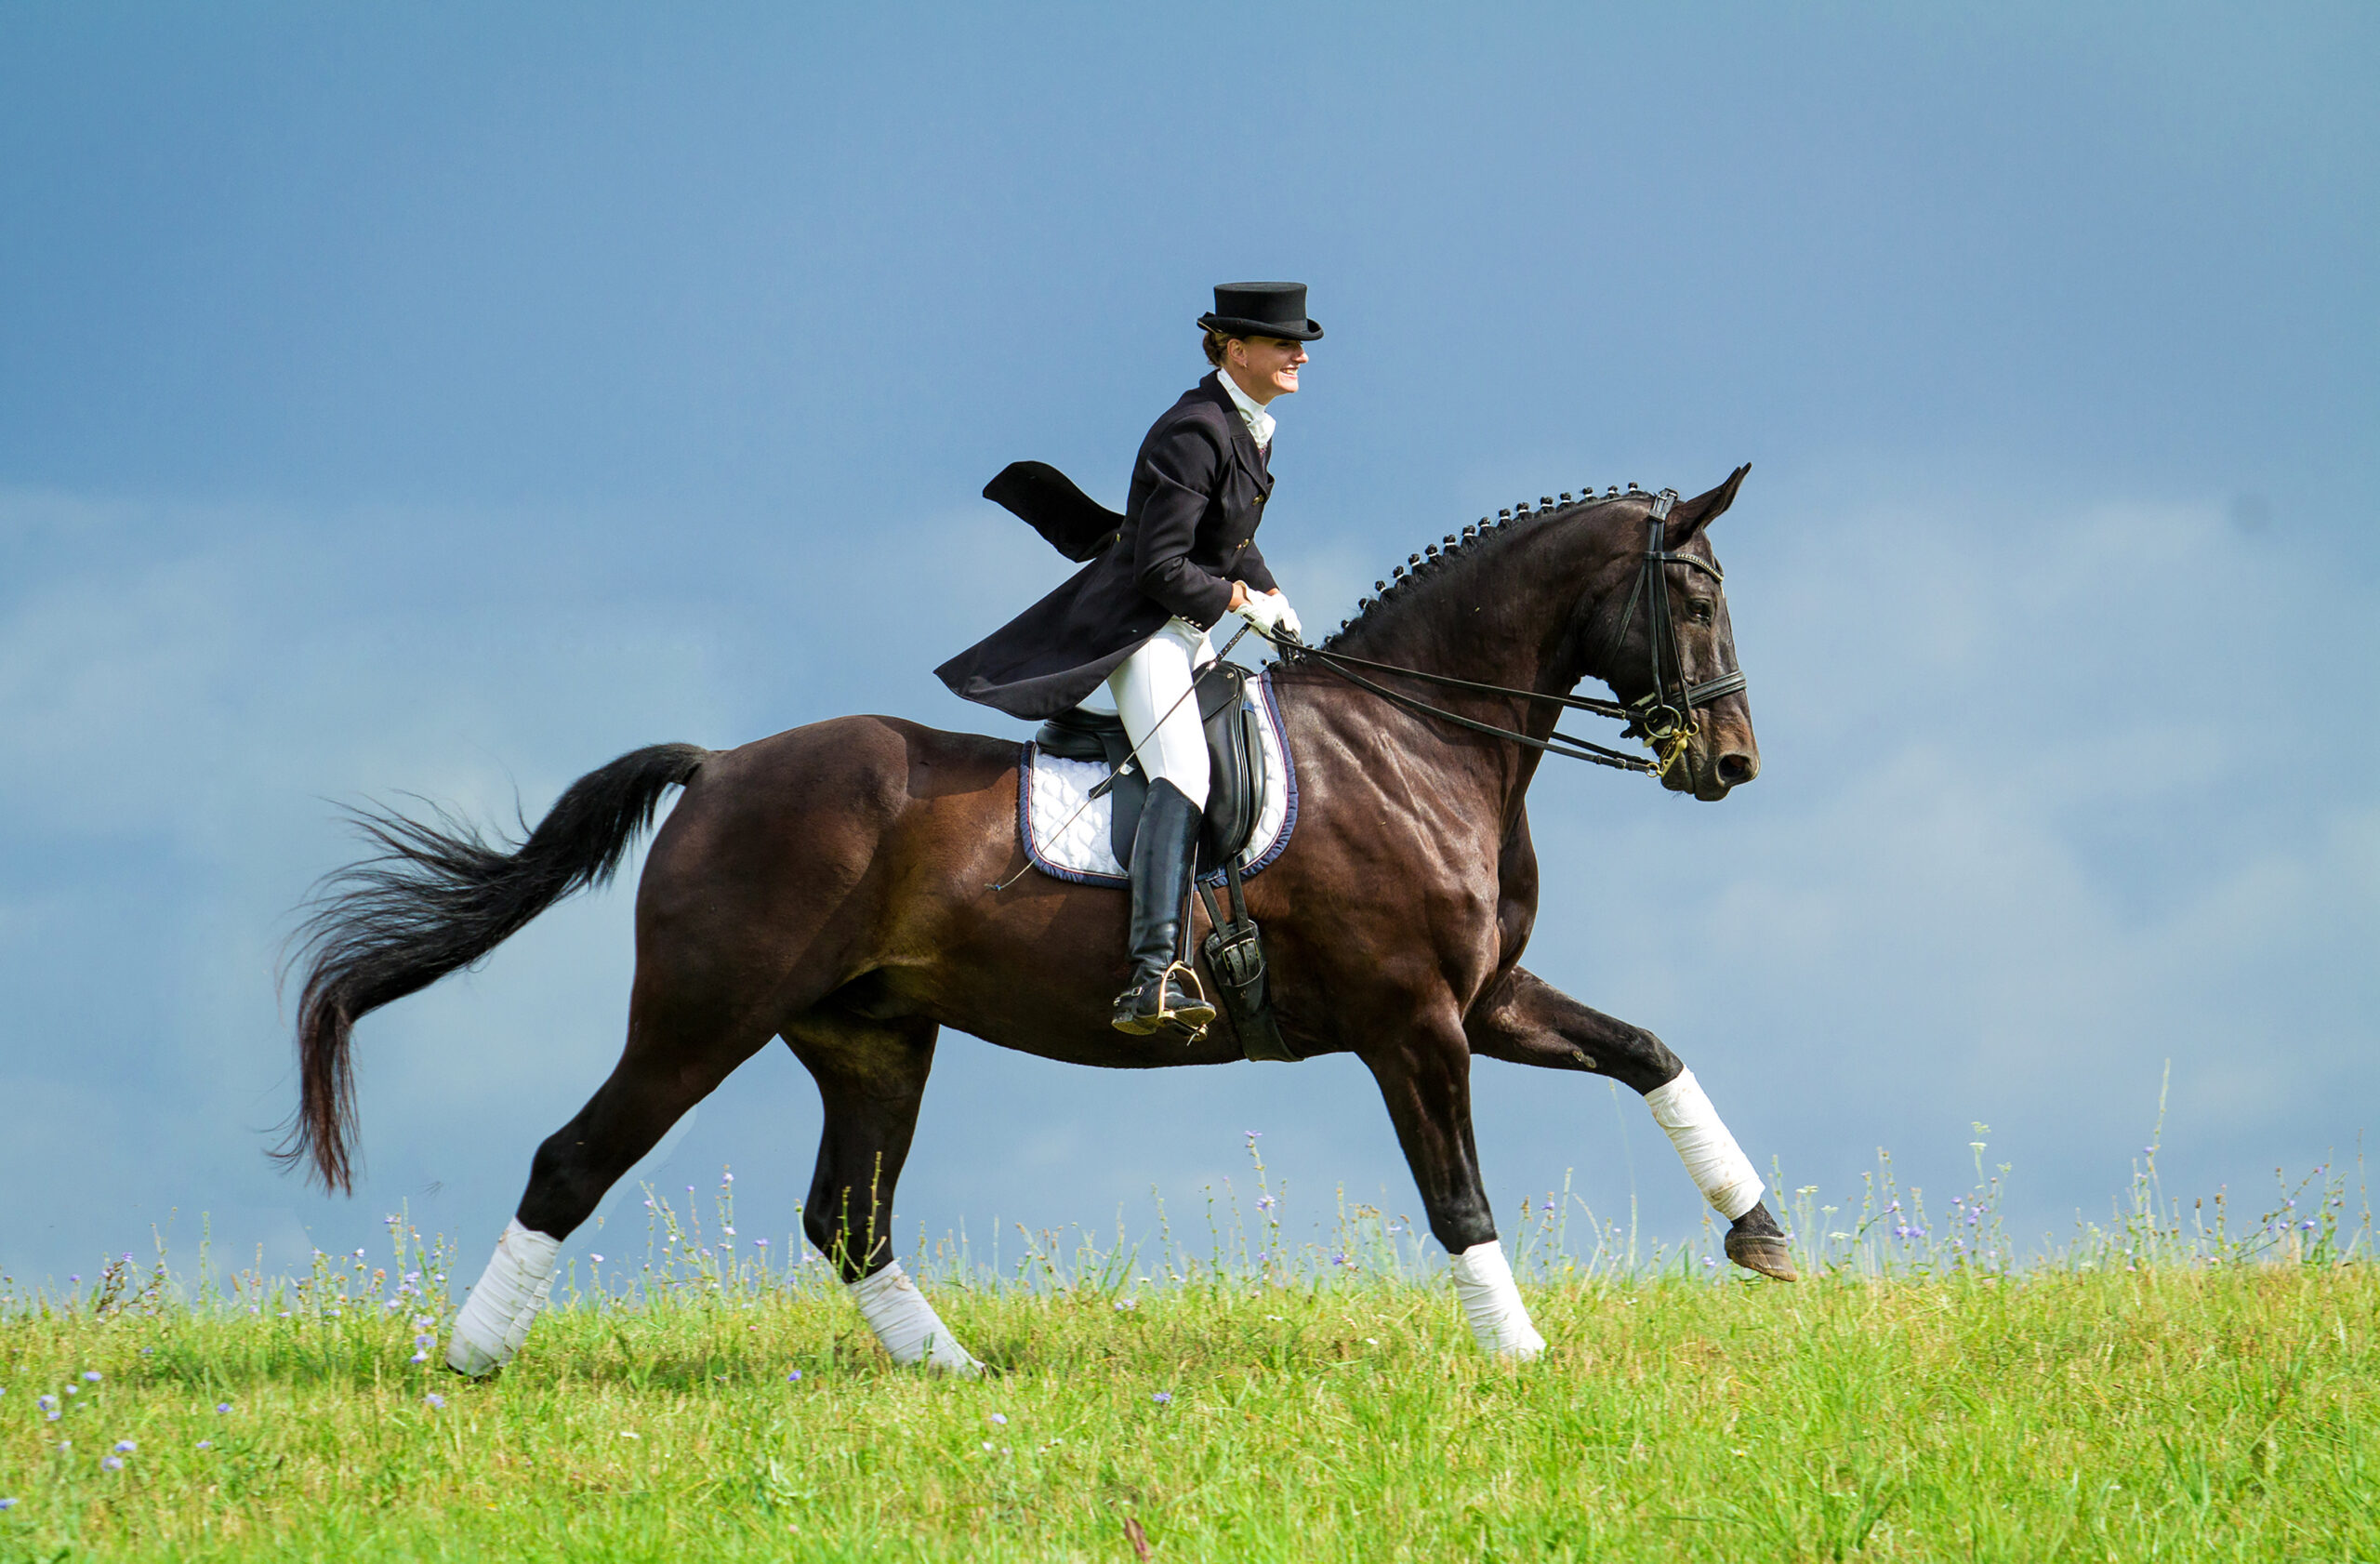
A nice frame for an Advanced horse.
“The first impression
is seriously important.”
There are three Equestrian Australia (EA) Advanced level tests — Advanced 5.1, 5.2 and 5.3. The purpose of this level is to confirm that the horse demonstrates correct basics, and has developed sufficient suppleness, impulsion and thoroughness.
The horse should remain reliably on the bit, and show a clear uphill balance and lightness as a result of improved engagement and collection. The movements should be performed with greater straightness, energy and cadence than at Medium Level.
We catch up with our resident FEI rider, coach and virtual competition judge, Roger Fizhardinge, to see what tips he has for riding a great Advanced level test.
“It’s a big jump from Medium to Advanced, especially when you’re thinking that the next stage is Prix St Georges, which is FEI,” says Roger. “The 5.3 in my opinion is even harder to ride and put together than the Prix St Georges. Really, it’s an FEI class without it being FEI!”
1. The frame must be more uphill
At Advanced level, the horse should be starting to show a more uphill frame that, as Roger explains, needs to come about as a result of elevation of the forehand — not just the neck.
“The frame has got to be more uphill; not the neck up so much, but the entire forehand. So the horse stays round, the nose approaches the vertical, the poll is the highest point because the engagement and the sitting of the horse from behind lifts the forehand higher, with a beautifully arched neck.”
2. Make good use of your warm-up time
By the time you reach Advanced level, there are many different movements that need to be ridden and Roger believes it’s important to run through them in your warm-up.
“I would always practise the movements where they are in the test. I wouldn’t string them all together, as you don’t want to introduce anticipation, but tick them all off. This ensures it’s fresh in the horse’s mind and it doesn’t come as a surprise. Always do it on the same rein and in the same place that it is in the test, in your warm-up.”
3. Perfect the preparation for the entry in canter
The Advanced tests are the first where the entry must be made in canter, and as Roger explains, preparation is key. “It’s collected canter, straight on, halt, immobility — which is very important to hold for at least three seconds — and then a clear transition to trot out of it. There is no more walking out of the transition!
“For me, it’s always good to make a small 10 circle outside the arena somewhere before entering. And even on the long side, maybe a transition from collected canter to halt to trot, before you go into the arena, so that the horse is very aware and that movement is fresh in his mind and makes it easier for you to ride.
“Remember, the first impression is seriously important. So if you nail that halt and the horse stays dead still, then you’re going to be off with an 8 or an 8.5. Starting on 85% is a really big bonus, I can tell you!”

A lovely Medium trot.

Collected trot. © Roger Fitzhardinge

Preparation is key for the lateral movements; here the rider is setting up for the half pass. © Roger Fitzhardinge
“It’s a very important movement
to show adjustability.”
4. Show clear transitions between collected, medium and extended paces
“At Advanced level, we’re looking for clearer and more definite distinctions between collected, medium and extended paces. There are no working paces any more,” says Roger.
He says one movement that is often done poorly in the 5.1 test is where combinations are required to change rein across the diagonal in medium trot and show 6-7 strides of collected trot over X, and then transition to collected trot again on the following short side.
“It’s a very important movement to show adjustability. So medium trot, clearly into collected trot, and you want to come back within two or three strides to collect it. You then keep it for the 6-7 strides, and then you do a clear transition springing back out into the bigger medium trot.” Roger explains that the mistake here is that riders often fail to transition back to a proper medium trot after the collected steps, and before making the next transition to collected trot at F.
“It’s also important to make certain that your horse stays round and the neck shape stays basically the same throughout; a little more collection in the collected, and a little bit more uphill and bigger strides in the medium pace. You then need a clear transition back to collected trot before the corner and a good corner. I don’t need to mention corners ever again, because every single corner is important!”
In the 5.1 test, there is also a similar movement in canter that asks the horse and rider to circle left 20m and show 5-6 strides of very collected canter between the quarterlines as a precursor to the working pirouettes in the subsequent Advanced tests.
“It is really important to make certain that you can really keep the collected steps. You must make it very short and bouncing. It’s super important to show very clearly in and very clearly out; some people ride the collected canter steps in and then stay with those very short steps for the rest of the circle. It’s collected canter, canter on the spot, collected canter again. The transitions in and out are vitally important.”
It’s also crucial to understand the differences in the walk paces at Advanced level. “The important thing is that you’ve got to shorten the steps in the collected walk, not just the frame. In the collected walk, the horse should just track up; it shouldn’t have a big over-track. It’s not helpful, and it doesn’t fulfil the criteria for collected walk. So not only does the frame become shorter and higher, but the steps also become shorter and higher.”

Positioning and control is important for the working pirouettes in canter.
“It’s a good way to lose marks!”
5. Preparation is key for the more complicated lateral movement sequences
As Roger explains, one of the most important things is to set up the half-pass correctly.
“When you come around the corner, it’s important to get a feeling of pushing the horse towards the wall away from your inside leg so you get the balance of the horse to the outside. As you do that you create a little more inside flexion, and then you begin the half-pass.
“Take the half-pass to X and then keep the same flexion and bend, and go onto the 10m circle with the feeling that you’re going to ride a little more forward. Without doubt, that circle often isn’t very well ridden because everyone loses a little impulsion in the half-pass and then they don’t keep the horse sharp enough for the circle.
“With the shoulder-in on the centreline, it’s very important to get shoulder-in, not quarters out. So keep your eyes on C, ride your body towards C, keep the same flexion and bend as on the circle, and carry that same angle down the centreline. Don’t wobble and go left and right and change the angle around — keeping the same angle is a very important thing in that shoulder-in.
“If you can and you feel confident, it’s always nice to see a rider straighten at the end, because the test says shoulder-in to G. So you’ve got six metres from G where you should be straight before you turn at C.”
6. Keep the rhythm in those half pirouettes in walk
“It’s a good way to lose marks!” says Roger, referring to the half pirouettes in collected walk that appear in the 5.1 and 5.2 tests.
“Number one, you must keep a good, collected, active walk coming into the pirouette and the horse must stay flexed and bent in the direction that you are turning. You should come out with that same flexion and bend, and the same collected walk, and then change positions; it’s a new position shoulder-fore for the next pirouette. Keep an active walk, and don’t lose the rhythm.”

Collected canter.
“The number one thing is to get
the changes right and number two
is to make no mistakes counting!”
7. For terrific tempis, be clean, count and… look to the corner!
The Advanced tests introduce sequence changes, starting with three changes on the diagonal (at the first quarterline, centreline and last quarterline) in the 5.1, four tempis in the 5.2 and three tempis in the 5.3.
“For the quarterline, centreline, quarterline, there’s no rule about the strides, however, I find it’s really nice to do five because it fits in really well,” says Roger. “It doesn’t have to be a sequence so long as you show preparation, a change on or near the quarterline, preparation and a change on the centreline, and preparation and change on the quarterline again. This movement shows that you’ve actually got control; it shows the horse waits for the rider.
When it comes to the tempi changes, Roger explains that the number one thing is to get the changes right and number two is to make no mistakes counting! “Everyone counts a little individually, but it’s important that you get that very well practised first. It’s not easy with the Advanced horses to get these tempi changes correct.
“Keep the horse very straight, and don’t exaggerate the flexion and bend. The middle change should be over X, so practise that, as it will seem like you’re waiting forever to begin. You’ve got to make certain that you keep your horse on your aids and ready for that first change, which will be after the first quarterline.
“To be perfect, you need the middle change over X… but if your horse prepares a little early and is ready in the test, it’s better to get the three changes done in a sequence and with good changes. So don’t mess up making good changes, for the fact that you tried to make him wait and stop him anticipating a little.”
Roger has one other little tip for riding the sequence changes: “The other thing with those changes, when you pick the line to come out of the corner (on the diagonal line with an outside rein straightening the horse’s neck so you’re preparing him already for the first change) don’t look at the marker on the other side of the arena… look at the corner. For some reason everyone rides way too much to before the letter. So if you keep practising riding at the corner, you will end up at the letter. Don’t ask me why, it just works that way!”
8. Positioning and control is important for the working pirouettes in canter
“The quarter pirouette at X in the 5.2 is a bit of a difficult one,” says Roger. “It’s difficult to position it correctly; you need to visualise a large 44-gallon drum at X and you can ride to the outside of that drum, and when you get to the drum you can be very, very collected, almost cantering on the spot. Keep the quarters on that drum, and take three, maybe four steps, canter, canter, canter, around the drum and then you ride forward on the other diagonal line across to the quarter marker. It’s the positioning; don’t go to X, you’ve got to keep a little to the outside of X. Coming off the left rein, you will stay to the right of X, and vice versa.”
The 5.3 test calls for half working pirouettes with a two-metre diameter, and Roger believes the reason for this is to show control.
“If you step out two metres on the ground, and make a half circle of that distance, you’ll notice it is quite large. And the reason I believe that’s in the test is to show control; the horse must not take over and ride a zooming around pirouette. It’s better if the judge can see you are able to control every step.
“It’s about getting the horse back to a collected canter that you can cope with to make the working pirouette. So you get the canter back, and then design the half working pirouette around that two-metre circle, and that two metres is with the hind legs, so the front legs are going to be a four-metre circle — so quite large.”

Finish with a smile and show a positive attitude!
“There are still 60 marks to go
down when you finish your test.”
9. Balance is crucial in the canter half-pass movements — and riding renvers can help
Balance is big thing when riding canter half-passes into counter canter and/or flying changes. The 5.1 test asks for a canter half-pass into counter canter, followed by a flying change. As Roger explains, you can help gain better balance in movements like this with the slight use of renvers.
“In the canter half-pass into counter-canter before the change, I always like to think that you have a little feeling when you get on the long side where you put your horse in renvers. So the quarters are on the wall, and the forehand is a little tiny bit off the wall. And then that’s good preparation for a clean flying change and helps with the balance.”
The half-pass zigzag, or counter change of hand, (in the 5.3) begins with a half-pass right to X. Again, keep a little balance in the corner to the outside of the horse and begin the half-pass with the forehand leading a little.
“As you get to the centreline, straighten the horse and almost think that you’re going to put him into renvers. And as you get to the renvers position, you then change the flexion. So it then becomes like shoulder-in, and then make the flying change, and then the half-pass the other way, and the same when you get to the long side. So, you go half-pass to the long side, put the quarters over, keep the horse straight, position shoulder-fore, flying change.”
Another tip from Roger is that when you’re training the change of direction in the half-pass at home, don’t let the horse start to anticipate the flying change due to the change of flexion. “Don’t let the horse take over and duck sideways in the half-pass to the new direction. Practise riding half-pass right, and as soon as you’re in half-pass right, change the flexion to the incorrect flexion for the half-pass, and keep going across so they learn not to just do a flying change with the change of flexion.”
10. Remember there are still marks to give after that final halt!
“Including the coefficients, there are still 60 marks to go down when you finish your test,” reminds Roger. “There is a mark for paces, so make certain the horse walks out of the arena with great purpose and a really good walk, with the neck stretching and relaxed, as that will give a good impression to the judge and refresh their mind about the paces.
“Then there is the impulsion that has to get a mark, then the submission, so if the horse is relaxed and stretching in a good way after the test, that will help that thought pattern as well for the judge.
“And then riding; if you show a grumpy face at the end of the test or give your horse a kick on the way out… any of those slightly bad-tempered attitudes don’t go down well with a judge and your rider mark could go from a 7 to a 6. However, you could go from a 6 to 7 if you pat the horse, smile, acknowledge the judge and give them a friendly look to say you’ve done the very best you could do on the day and thanks for your time.
“Also, when you get out of the arena, don’t pick up the reins and try to practise the movement where you made a mistake!” says Roger. Although your test ends after the salute, remember you are always being watched! EQ
Equestrian Australia Advanced tests:
Riding the Preliminary, Novice, Elementary or Medium tests? Roger has covered these in our previous issues:
10 Tips for Riding the Preliminary Tests
10 Tips for Riding the Novice Tests


